

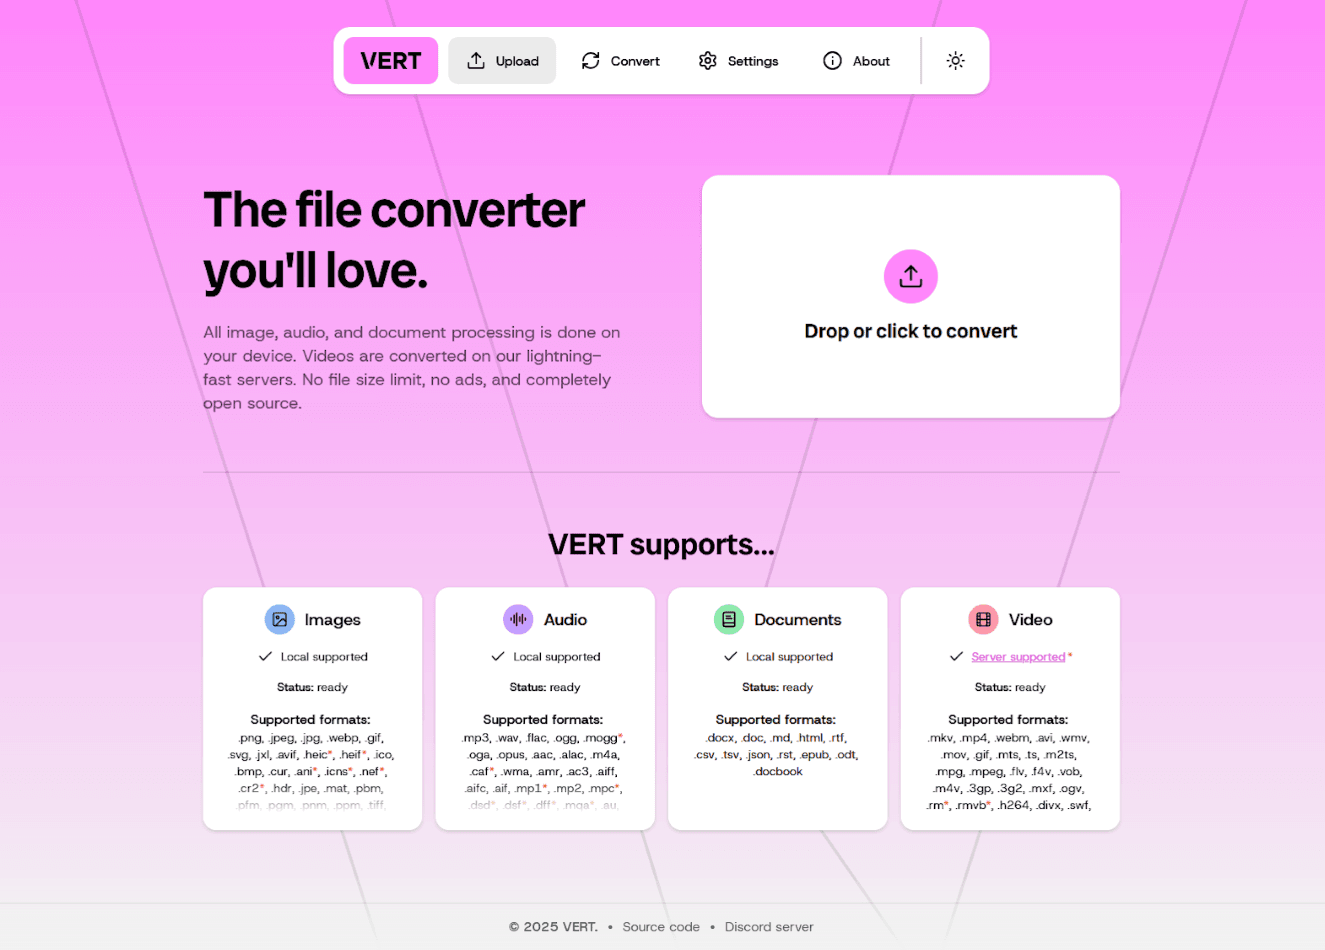
VERT is a free, open-source file converter with a browser interface. It handles many everyday format changes without installing a desktop conversion suite. Non-video conversion runs on your device; supported video conversions can run locally, while others can use a video server. That distinction matters before choosing confidential input. This guide follows VERT’s current interface descriptions, documentation and source checked on October 13, 2026. AltStack has not independently tested every format pair. Keep originals and inspect each converted file before replacing a working copy.
1. Pricing: free conversion does not mean unlimited computing resources
The official project describes VERT as free to use and publishes the web application under AGPL-3.0. Its optional video daemon, vertd, is GPL-3.0. The ordinary hosted workflow does not require purchasing a software subscription; project donations are separate. Hosting your own instance can incur server, storage, electricity and maintenance costs.
The project advertises no general file-size limit, but your browser still has memory and processing limits. A selected video server can also expose its own limit or availability status. Treat those as practical constraints rather than a guarantee that any huge file will succeed. VERT can replace a paid converter for a supported task. It does not reconstruct a perfect original authoring project, remove content protection or automatically preserve every advanced feature of a document.
2. Open the browser app and choose a small working copy
Open vert.sh in a current browser. Use the main Drop or click to convert area to select one file, or drag a working copy into that area. Start with a modest image or document you own. You do not need to install Bun, Docker or vertd for ordinary hosted non-video conversion.
Wait while the required conversion engine becomes ready. Browser processing can still require an initial download of application code and conversion modules. Keep the tab open while the job runs. When VERT shows a file card, confirm the filename and choose the required output extension from its format selector. Only use an offered input/output combination. An extension being listed somewhere in a converter does not mean it is supported in both directions, and renaming an unsupported input is not a substitute for conversion.
3. Convert an image and inspect it at full size
For a practical first job, select a PNG you created and choose JPG from the output formats if the app offers that combination. Use the file’s conversion control, represented by a circular-arrow icon in the current interface. Wait for completion, then use the download control to save the resulting file. Save it under a new name so the PNG remains available.
Open the downloaded image outside VERT. Check its dimensions, orientation, edges and any small lettering. JPEG does not preserve transparent backgrounds, so choose an output format appropriate to your intended use. Avoid repeated lossy conversions: return to the untouched original when trying a different quality level. A successful download proves a file was produced; visual inspection establishes whether it is suitable for your upload form, presentation or website.
4. Convert a document and verify structure
Select a simple Markdown file you own and choose DOCX when offered. Start conversion and save the output. Open that DOCX in your document editor and compare headings, lists, links and tables with the source. This is a useful first exercise because you can see whether the document’s structure survived, rather than judging only its file extension.
VERT’s current document converter uses Pandoc and lists formats such as Markdown, DOCX, HTML, ODT and EPUB. Supported input and output directions differ for some formats; the current source excludes old binary DOC input. Complex layout, embedded objects or application-specific behavior may need another workflow. Do not treat the presence of a document category as proof that every PDF or every Word feature is supported. If the format you need is absent, retain the original and choose a tool explicitly documented for that job.
5. Convert audio without mistaking a larger file for better quality
Choose an audio recording you are permitted to process, such as your own WAV recording, and select MP3 if offered. Run the conversion and download the result. Play its beginning, middle and end in your normal audio player, check the duration and compare speech or music with the source. Start with the default settings before adjusting bitrate, sample rate or channels.
The current audio converter supports several formats through FFmpeg, including WAV, MP3, FLAC, Ogg and M4A. The useful choice depends on the player or upload destination. Converting a compressed recording into WAV cannot restore detail already discarded by its original encoder. For a smaller shareable file, compare size and audible quality; for editing, preserve the original recording. Keep the exported result separately until you have verified playback and any track information you need.
6. Read the processing choice before converting video
Add a short video you own and select a supported target format. VERT’s current Video Conversion documentation and settings page describe local browser conversion where supported, with vertd server processing for other cases. Do not assume every video remains on your device because the homepage describes local processing. Check the chosen converter and any external-upload warning before continuing.
If the job uses the hosted server, the file leaves your device. The project’s FAQ describes temporary retention, including an hour for unconverted uploads and deletion after download or the stated retention period for converted output. Those are provider-described policies, not an AltStack audit. For confidential recordings, keep the job local or use an appropriately controlled local daemon. If you cannot establish where a particular job runs, do not submit sensitive footage. A format change also cannot bypass DRM or grant rights to a commercial video.
7. Save useful defaults and make deliberate metadata choices
Open VERT’s Settings page. The Conversion area includes a filename pattern, optional default output formats and metadata handling. A descriptive pattern can distinguish converted files from originals. The current settings explain tokens for the original name and date, such as %name% and %date%. Choose defaults only after you have checked that the format suits your usual destination.
The File metadata setting controls whether information such as image EXIF or song details is kept. Removing metadata can be useful before sharing an image, but verify the resulting file if privacy matters; one setting is not proof that every identifying detail disappeared. The image-quality control trades output size against quality. Change one option, convert a sample and inspect it before adopting that setting for a batch. Preferences are convenient defaults, not a guarantee that every input has the same requirements.
8. Manage cached modules and understand network activity
VERT’s Settings includes cache management for conversion files, so repeat use can avoid downloading the engines again. It also provides Clear all site data, which resets settings and cached files. Save your converted outputs somewhere reliable before clearing browser data or closing the session. The site is a processing workspace, not your long-term file archive.
The hosted service documents Plausible analytics with an opt-out in Privacy & data. Local conversion does not mean the application makes no network requests: the page, engines, analytics and optional video service have separate roles. The self-hosting documentation also notes that its external-request-disable build option still downloads the FFmpeg WebAssembly build from a CDN. For restricted data, review your actual deployment and processing route instead of relying on the word local alone. Avoid changing network protections globally to repair a converter.
9. Install a local instance only if you need that control
Self-hosting is optional. VERT’s Getting Started page currently requires Bun: obtain the official repository, install its dependencies, create a local .env based on the provided example and use the documented development command. Its development address is http://localhost:5173. For a maintained deployment, use the official production-build or Docker instructions rather than leaving a development server publicly exposed. These are provider-supported setup options, not steps AltStack executed for this article.
A local web interface alone does not automatically make video-server jobs local. For that, follow the vertd setup guide for your operating system and its requirements, then point VERT’s video-server Instance URL to the local daemon. The documented default is http://localhost:24153 on the same computer. Keep it limited to the intended local environment. Review current dependencies and configuration before running downloaded software, and account for disk, CPU or GPU resources when deciding whether self-hosting is worthwhile.
10. Diagnose failed jobs and check the final deliverable
If conversion is unavailable, read the card’s message before retrying. The current interface distinguishes unsupported input, output-only formats, engines still downloading, worker errors and size-related failures. Wait for a downloading engine, try a small known-supported file and check free device memory. A broken or mislabeled input may need repair in its original application. Do not repeatedly submit a sensitive video to different servers while diagnosing it.
For server conversion, examine the configured instance status and any stated limit. For a large local job, reduce the batch or use a suitably equipped machine instead of assuming the advertised general size policy overrides browser limits. Finish by opening the downloaded result in its intended application, checking content and saving both original and output. Record the settings used for a successful sample before processing a larger collection.
Official instructions and sources
Official hosted converterFree software claim, AGPL license and processing qualificationsCurrent conversion, video-server, privacy and cache settingsVideo processing and local daemon connectionProvider retention and analytics FAQOptional local installationOfficial Docker deployment instructionsCurrent conversion interface and error handlingSupported document input and output directionsAudio formats and settingsLocal video daemon and its separate GPL licenseBuild-time external-request settingsOriginal AltStack guide by Sushil Kumar Sah. Installation steps follow provider documentation; they do not imply testing on every supported device.